November Highlights & Happenings

Posted by sew4tejhtr6ier Jumat, 29 November 2013 0 komentar
Happy Thanksgiving!!
(Well, to those of you who are in America...to those of you who are not...happy end of November!!!! *grin*)
Are you sprawled out in front of a fire, a glass of eggnog (or if you're me, soynog) in hand while reading this? *contented sigh* Aaaahhh the vacation season!
 (To those of you not in the U.S., a cold weekend counts as a good enough reason to drink eggnog and put your feet up by a fire). *wink*
Of all the holidays, I appreciate what Thanksgiving can be...well, when I'm willing to trade in gluttony for expressions of thankfulness! *grin* 
I have much to be thankful for, but I am most thankful for my darling little family! 
I've never posted a picture of my family on the blog before. I figured no one would care much since I'm blogging about home DIY...I am surprised at how many emails I get asking why I haven't posted a family picture! The most you've probably seen is the corner of a little person here or there, but never an entire photo of my family. So I thought I'd introduce you to them! Family, these are my readers, readers, this is my family!


Hmmm, because this family pic is about 9 months old, and because a picture is suppose to be worth a thousand words...here is a recent pic that depicts us a bit more "true to form". The hubs took it, so this one is just of all his girls. 


BOOO!
Scared you right? *giggle*

Last Month's Completed Projects
Enough about my personal life. Lets get back to my personal home decorating. *grin*
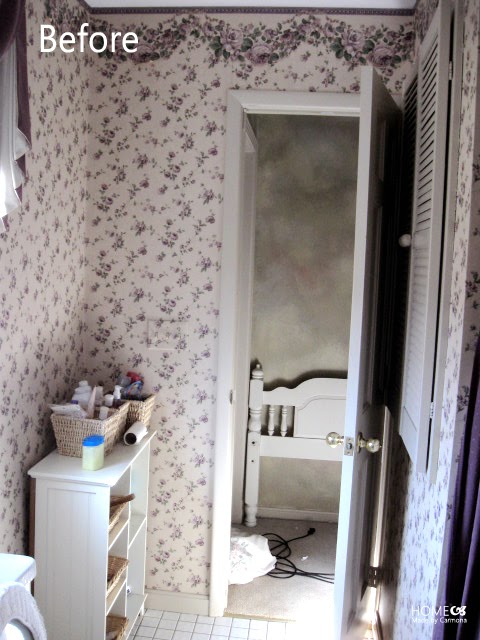
If you missed it, this month was filled with bathroom reno projects, because I figure my holiday guests will appreciate pretty and functional bathroom spaces. See the entire reveal and a detailed $83 makeover budget breakdown here.

LULU & GEORGIA INSPIRED RUGS
click here to read more


How to make these inspired rugs for $9!

ART ON A $10 BUDGET
click here to read more


Learn clever ways to create an art grouping on a slim budget.

DIY HAIRCLIP HOLDER
click here to read more


Store fancy clips in an art grouping!

In case you didn't see it, my DIY Rug Tutorial was featured over at Knock Off Decor this month! Such a fantastic site dedicated to all kinds of creative knock off tutorials. Who say's you have to pay through the nose for lovely things? Thanks for the shoutout!

I was also thrilled to be able to feature a tutorial and Q & A from a blogger I who knows how to take DIY to the next level, Kelly from View Along the Way. Check out this first of many "Take It From The Pros" projects. This ongoing series lets me re-create some of our favorite blogger projects, and get one step closer to my dream house! If you missed it, you can read the post here.


What's Next?
Well, I almost forgot to share the downstairs bathroom reveal...in my defense I was sick for a week (chills and everything). Thankfully I realized it a couple days ago, and added it to the December lineup!
As for projects, well I know I said I'd tackle a space a month, but hey, let me catch my breath a moment! I'm prepping for the holidays and I have quite a bit to do. No worries though, I'll be sharing all my guest prep and holiday what-not's...after all, you have quite a bit of planning too right? I CAN'T WAIT!!

Happy Holidays!


Baca Selengkapnya ....

Jack & Jill Bathroom Reveal

Posted by sew4tejhtr6ier Rabu, 27 November 2013 0 komentar
This bathroom makes me soooooo happy! I seriously avoided passing this bathroom because it made me anxious and frustrated. My girls had a hard time keeping it tidy, and it seemed to get uglier every time I saw it. Now with some careful planning it is pretty and practical! But wait, I've saved the best for last, this bathroom was decorated and organized for a grand total of $83. Some of you who have tracked how much they spend on a single room know how little that is, and how ridiculously hard that was! *grin*  This just goes to show that a little elbow grease, and some paint can go a long way!

Budget Breakdown
There are a few items I managed to get cheap or free, so you may want to factor in a little extra...but here are all the details of what I spent on this bathroom, and a few extra details you may need to plan your own inexpensive bathroom makeover! Ironically, the most expensive part of this makeover was buying storage baskets. 
  • Bath Rug - $9: Target rug, $7.19 (after 10% reduction for damage). Leftover paint, $0. Painters tape, $1.29. 
  • Shower Curtain - $10: Fabric bolt $7 from Habitat for Humanity Restore. $3 for thread and 1 spool of ribbon.  
  • Wall Art - $10: 3 Walmart frames, @ $1.97 each. Goodwill materials & frames, 50 cents each. Staples prints, $0 (after staples rewards...49 cents each w/out reward). Braces, $1.19 (also used on vanity).
  • Storage & Accessories - $32: 3 baskets from Kohls (with coupon), $28.86. 3 bowls from Goodwill @ $1 each. 3 bowls previously owned $0.
  • Hardware - $11: 2 Gatehouse brand handles @ $2.91 ea. and 3 hooks @ $1.98 ea. from Lowes (less one 10% off total purchase coupon). 
  • Wall Paint - $12: 50% off Glidden paint from Walmart's discount paint section.
  • Vanity Paint - $0: Leftover from coat closet project.
  • Miscellaneous Project Materials - $0: Already owned. Includes painting tools, gel stain, gold spray paint, sheets, and white paint. 

Before & After
There is simply nothing more satisfying than seeing all your little projects come together at the end of a makeover. Well, let me use the term "end" loosely, you know DIY'ers, we just don't seem to be able to rest. *chuckle*
This bathroom truly is a compilation of small projects, all simple but effective projects. These are the items that serve a purpose, however that doesn't mean they can't be pretty as well. These small projects are also the key to decorating as cheap as possible, otherwise buying these items, even at sale price will run you up a pretty penny in the end.

Project Links:
THE PAINTED VANITY | HOW TO STAIN A BASKET | GOLD STORAGE BOWL DIY | RECESSED BATHROOM STORAGE | BATHROOM ART ON A $10 BUDGET | DIY HAIRCLIP HOLDING ART | DIY SHOWER CURTAINS | LULU & GEORGIA INSPIRED RUGS

View from the hallway before and after.


View from the bedroom before and after.


View of the shower curtain before and after.


Bathroom storage before and after.


Bathroom vanity before and after.


Link Love


Baca Selengkapnya ....

Free Download Cute Wallpaper for Android

Posted by sew4tejhtr6ier Selasa, 26 November 2013 0 komentar
i think in this world, almost all people have a smart phone, i dont know apple, android etc, and sure you can have many cute wallpaper for your android. right? so you can download this wallpaper with free,
check it out !!!


Baca Selengkapnya ....

Lulu & Georgia Inspired Rugs

Posted by sew4tejhtr6ier Minggu, 24 November 2013 0 komentar
The other day I was over at Lulu & Georgia, drooling...as usual. Is this my life? To be spent admiring items beyond my means? Drat my ridiculously good taste! *lopsided grin*
This gorgeous Paint Dot Rug and Arrowhead Rug are positively calling my name, but since they cost more than I spent to makeover my entire bathroom, I guess I'll have to settle for a DIY version. 

Materials & Cost
I was thrilled to find these washable cotton kitchen rugs at Target. They absorb the paint well, have plain white backsides, plus I was able to get 10% off because they all had speckles on top! Yep, in my world every cent counts! *wink*
Because I am using the backside of these rugs, it kind of makes these rugs reversible! The paint will not soak through to the other side, so if you wanted you could paint different designs on either side and get two styles for the price of one!
  • (Target) Kitchen Rugs - $7.19 each
  • (Walmart) 1 Folkart metallic paint, 2 fl. oz. - $1.77
  • Leftover Interior Wall Paint, 1/2 cup 
  • 3/4" Painters Tape
  • Sponge brush &/or paint brush
I did not count the interior paint, tape or brush in my final cost for making these rugs since they are items we probably all have lying around...but if you do not have these items you should factor another few bucks into your budget.


Creating An Arrowhead Inspired Rug
Start by creating a chevron design on the rug with your painters tape. Find the middle of the rug and work outward. Oh, and really press that tape down good...I had a couple areas where I pulled the tape up then didn't press it back down properly and the paint bled a bit more than I liked.
Cut your tape strips to equal lengths, this will ensure some consistency of pattern.


You could eyeball a chevron design, however if you really want to keep some consistency, cut out a triangle to use as a taping guide.


Continue the chevron design across the entire rug, keeping a 2 inch space between each chevron layer.


Once you have created the chevron design, cut long strips of painters tape in half and tape them across the tips of the chevrons.  


Dilute your interior paint with a few tablespoons of water before painting your rug. You want the paint to be more like a dye than paint...this prevents the paint from drying hard and cracking. It also makes this rug hand washable! The first couple washes use diluted vinegar to soak it and allow any excess coloring to run off.


Peel the tape back before the paint has dried completely. Here is a shot after all the tape was peeled off, but before the paint had dried...it will be a bit blotchy until it dries.


I love my new folksy Arrowhead rug. 


See the entire $83 Jack & Jill bathroom makeover reveal here. It is the small projects like this one that keep your budget on track, but make for a great finished space!

Creating A Paint Dot Inspired Rug
The irregularity of the dots are what really make this rug. Sadly this particular type of irregularity does not translate too well into DIY...it just looks like you couldn't paint a circle! *chuckle* Plan for your circles or ovals to be much more precise. If you really want that imperfect look you do have two options: 1. You can create an intentional irregularity within a stencil and then keep each painted dot consistent with the last. 2. Make your ovals/circles more precise, but vary their distances and angle slightly.


The normal course of action would probably be to create your own oval stencil. And what stencil could be easier to create? I don't currently own any stencil materials, so sometimes you have to break out what you have. I used the ring of a canning jar lid and squished it slightly into an oval shape. I cut 4 slits so that it would be able to lay flush on the rug surface. Once you find the center of your rug, start there and work your way outwards, eyeballing an equal space between each oval.


I used the sponge brush to quickly fill in the middle, then a smaller paint brush to be sure that all the edges were well covered.


I admit this is no Lulu & Georgia, but I love this rug in my downstairs bathroom! It adds just the pop of design and color needed.  


And there you have it! Two Lulu & Georgia inspired rugs. I may be using mine in my newly made-over bathroom spaces*, however these would be just as lovely in a kitchen, laundry room, entry, or any other space!

*See the entire $83 Jack & Jill Bathroom Makeover here, or the $36 Powder Room Makeover here. These rugs were just the icing on the cake! *wink*


Baca Selengkapnya ....
Trik SEO Terbaru support Online Shop Baju Wanita - Original design by Bamz | Copyright of wallpaper murals.